Saturday, December 5, 2009

Cupcakes & Fondant Flowers

I'm making boxes of cupcakes for Christmas. They are samplers, 4 cupcakes - 1 of each flavor.

Pumpkin with Cream Cheese Icing
Devil's Food with Chocolate Fudge Icing
Red Velvet with Cream Cheese Icing
Orange with Orange Buttercream

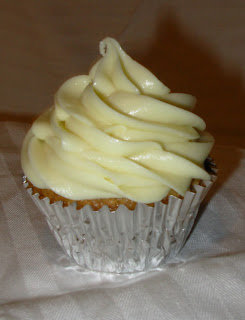
Here's a pumpkin mini cupcake. I'm not a huge fan of pumpkin, so I had to test it before I mass manufactured. These were so delicious, especially the cream cheese icing. The icing was a bit odd while it was mixing it acted more like a dough than an icing, but resulted in a very smooth and creamy frosting with just enough sweetness. The pumpkin cake was moise and light, not overpowering. Mmmm!


I used my new gum paste flower kit to make these fondant flowers. Simple, but cute! I was pleased with my first attempt. I used fondant because I had some on hand and didn't feel like making a batch of gumpaste. It took longer to dry and I used those cheap paint palettes to dry them with the curve.


Strawberry cake with cream cheese icing


Sugar crystals to add some sparkle

Have a sweet day!

Friday, November 27, 2009

Inspirational Posts

I wanted to acknowledge those other cake bloggers that have inspired me to try new things, learn new techniques, and start my own blog!


*Note: these inspirations are not wrecks, they are part of the Sunday Sweets collection featured every week.


This is one of my favorite sites, Louise has many how-to's with lots of pictures.


Warning! This is a very addicting website!

Cake Central is a large forum website with user submitted recipes, pictures, how-to articles, and heaps more.

That's all for now, have a sweet day!

Friday, November 20, 2009

Chalk Petal Dust

I am devoted to cake decorating and am establishing quite a collection of supplies. I have purchased shimmer dust in the colors available at my local craft store, but there were only 12 and I wanted matte powders too. When I went searching for petal dust the prices for small containers shocked me. There was no way I was going to pay that much money, there had to be a better way.

After much searching I stumbled upon a reference to chalk powder used on gum paste flowers. Voila! That was the solution I was looking for. So here are the instructions to make your own cheap petal dust using chalk.


Supplies needed: paper, cornstarch, non-toxic chalk, tea ball, small containers, gloves. I bought a box of sidewalk chalk with 20 colors for $2.20, cornstarch for $2.00, a tea ball for $2.00, and a $5.00 case with 24 small containers meant for beads. So $11.20, which is about the cost of two 1/2 ounce containers of petal dust.

1. Disassemble tea ball into two halves, wash all containers and dry completely.
2. Put on gloves to protect your hands, grate chalk through tea strainer onto a piece of paper.


3. Add 1/2 tsp cornstarch, also sifted through tea ball half. The cornstarch keeps the powder from clumping, but it also lightens the color.


4. Mix together with your finger and pour through tea ball half one more time to combine.


5. Fold paper and pour powder into container. Use a paper funnel and poking device (I used a mangled paper clip) to help if the opening to your container is small.


6. Snap on the cap and repeat for all desired colors. After all is said and done you have an entire kit of powders, and a lot of chalk and cornstarch left over for several more batches as you need them.


I will caution you that although the chalk is non-toxic it's not really tasty. Since you will probably use it sparingly it shouldn't cause a problem, just keep in mind if you are covering large areas. You can mix the powders with clear alcohol or an alcohol based extract (like almond or lemon extract) and use it as a paint. The alcohol evaporates, leaving behind just the liquid color, this keeps gum paste and fondant decorations from becoming soft after painting. You can also mix with clear piping gel to tint for writing, although I recommend using gel or paste icing color for large amounts.

I hope to make some gum paste flowers soon and use my new powders. I'll post pictures!

Have a sweet day!

Ice Cream Cake & Devil's Food Cupcakes

I have some catching up to do! I finally got the pictures off my phone onto my computer, so here's the ice cream cake I made for my husband for his birthday in September. It was two layers of ice cream and one layer of white cake with whipped topping and oreo cookies. It was delicious, easy to make, and so much cheaper than Baskin Robbins.


I also tested cake mix to make domed cupcakes to be dipped in poured fondant. I also used this same post from Louise's Cake Journal website as inspiration for the flowers & leaves on my Devil's Food cupcakes below. Betty Crocker mix versus Duncan Hines. I have always been steered towards Duncan Hines, but one week they were out of white mix so I grabbed Betty Crocker. The cupcakes came out very domed without my even trying. I wanted to be sure so I tested it, the winner is Betty Crocker for domed cupcakes!


Betty Crocker


Duncan Hines

I made a test batch of Devil's Food cupcakes with Chocolate Fudge Icing. I made rolled pink fondant roses and leaves using marshmallow fondant.


They were delicious, but the cake was very light and fluffy, I need to find a dense chocolate cake recipe.

Chocolate Fudge Icing
This icing dries thick and is very rich. I don't think it's too far off actual fudge. Sift cocoa and powdered sugar separately to prevent lumps.

2/3 cup butter (5.4 oz)
1 1/3 cups cocoa (5.3 oz)
6 cups powdered sugar (1 lb 9.8 oz)
2/3 cup milk (5.3 oz)
2 tsp vanilla extract

Melt butter over medium heat, add cocoa and heat just until bubbles form.
Pour into mixer bowl and cool slightly.
Add powdered sugar and milk, alternating, beat until smooth.
Add vanilla, beat until fluffy.


Sunday, November 1, 2009

Spice Ornaments and Banana Cupcakes

I've been busy this weekend, it felt good to be baking again. Yesterday I made spice ornaments. They smell heavenly, I'm going to have a hard time giving them away! Mostly I made gingerbread men but threw in a few gingerbread girls and snowmen.


Spice Ornament Recipe & Instructions
1 cup cinnamon
1 tbsp cloves, ground
1 tbsp nutmeg
1 cup applesauce, drained
2 tbsp white glue

Drain the applesauce with a fine strainer (about 1 1/2 cups makes 1 cup drained). Combine all ingredients with a spoon until it starts to form a ball. Knead for a few minutes until it is smooth but slightly sticky. Use flour on the dough and a cutting board to prevent sticking, then roll out 1/4 inch thick and use cookie cutters for desired shapes. Before removing cutter from dough make a small hole in the top with a toothpick for the ribbon to go through. Dry cutouts on stackable screens for several days until completely dry and hard, flipping over each day so they dry evenly. Then decorate as desired, I use royal icing if I want them to look like frosted cookies. You can use glue, glitter, buttons, candies, etc. You can spray or dip with varnish or shellac to seal and add gloss, but it would probably affect the scent. DO NOT EAT THE ORNAMENTS.

I also made banana cupcakes with lemon frosting. Very lemony, just how I like it! I'll take them to work tomorrow along with my huge bowl of leftover halloween candy to share.


Have a sweet day!

Friday, October 16, 2009

All Moved & Settled with Cookie Cake

I am back from hiatus. We've moved into our new house and are all settled. Plus I actually have some time away from my busy work schedule right now. To follow-up from my last post my white cake made with xanthan gum but without the bake-even strips worked well, althought I only used 1 tsp of xanthan gum and it didn't seem to hold it together as well - but it also wasn't gloopy. I also learned to mix the batter and add the xanthan gum at the last possible second, blend, and then pour into the pans to reduce the gloopiness. Technical word, I know.

The vegetarian red velvet cake with 2 tsp of xanthan gum still came out crumbly but they were slightly overcooked so I think that's the cause. I hope to make another test cake soon. The german chocolate cake with coconut walnut cream frosting came out great, everybody loved it. I was on a tight schedule that weekend with two cakes just a week before we moved and the frosting wasn't setting up quickly enough, even in the fridge so I added some xanthan gum. Then some more, and more, and more. I was able to frost the cake while the frosting was still a bit too thin but it hardened up quickly. I know there was too much gum and it made it really thick and sticky so I'll have to try it again soon with enough time for it to cool naturally.


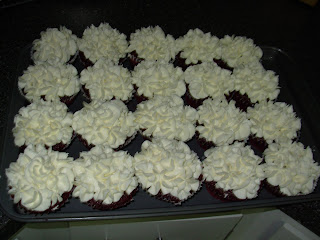
Last week I made cupcakes for Evelyn's goodbye party at work and a cookie cake for my co-worker's daughter. They both turned out great. Cupcakes were the typical red velvet and buttercream, I have 20 cake recipes and all anyone wants is red velvet. I was tired of swirls so I tried something different. They look flowery & lacy and I really like it.


The cookie cake was a new thing for me. I could have made the typical 1 layer thin cookie cake but I had a better idea, an actual cookie-cake. Cookie instead of cake. So I made a cake layer sized cookie.


I frosted the cookie cake with buttercream and decorated with summer-themed candies. The candies were fun and challenging to make. I did more planning with the order of the colors so it took much less time. Lots of toothpicks sacrificed themselves for these candies.


I asked my friend to take a picture of the cut cake and she so kindly delivered.


Have a sweet day!

Wednesday, September 23, 2009

Test Cake

I made a test cake to see if the xanthan gum would help hold it together better. I also used the bake even strips. The gum worked, the cake wasn't crumbly. I'm thinking the bake-even strips are making the cakes not bake completely through even though they look done. The cakes are sticking to the bottom of the pan even when I grease & flour them and with a parchment circle.

I will try again without the strips. It will have to be with white cake because I'm out of the stuff for red velvet until I go shopping again.

Here's my week for baking:
Friday: Ice Cream Cake
Saturday: Vegetarian Red Velvet Cake
Sunday: German Chocolate Cake

Sunday, September 20, 2009

Jugle Cake & Vegetarian Red Velvet Cake & Disaster

What a week! I had parcelled out the various tasks for my niece Hannah's jungle-themed birthday cake and on Thursday got a last-minute order for a vegetarian red velvet cake. Sunday I made fondant leaves for jungle trees and fondant ears for the elephant cookies. Monday I attempted to peel the leaves off the bowls I had set them on to dry curved and the elephant ears off the cutting board. They absolutely refused to come off. I ended up scraping them off with a steak knife and then scrubbing the bowls and cutting board. I got off what I could and then put them in the dishwasher.

Ok, so no fondant leaves or elephant cookies. Alright, that's ok. I can make leaves with the green royal icing I had made. There were no elephants on the party themed plates so we could live without those. Monday I baked the sugar cookies with zebra, lion, and giraffe cookie cutters from Wilton's Animal Pals Cutter Set. I always forget how many thin rolled-out cookies my sugar cookie recipe makes. So with about 80 cookies I fathomed I would decorate them all and we could have cake and cookies.

Tawny's Sugar Cookies
1/2 cup butter
1/2 cup shortening
2 cups sugar
3 large eggs
1/2 tsp lemon or almond extract
1 tsp vanilla extract
5 tbsp sour cream
4 cups flour
1 tsp baking soda
1/2 tsp salt

Cream butter, shortening and sugar. Add eggs one at a time, then lemon extract, vanilla extract and sour cream. Beat until creamy. Sift flour, baking soda and salt and combine with wet ingredients. Chill overnight and then roll out on a floured surface for cutters or into balles and then flatten with the bottom of a sugar coated glass. Bake at 350 degrees for 8-12 minutes just until the edges start to turn golden (bake time varies depending on the thickness), do not over bake.

Wednesday I worked late and then started frosting the cookies. This frosting can be used to outline the cookie and then thinned to fill-in the outline. This was my first time attempting the fill-in method, I had only used it to pour over cookies before. It was taking me a long time so I thinned the icing a bit more. Then I filled-in a whole bunch that looked perfect. They looked perfect until the icing kept settling after a few minutes and spilled right over the outline.

It was bedtime at this point so I scrapped the "decorate all the cookies" idea and picked three of the nicest lion & giraffe cookies. I frosted those and then picked the best of each animal, set them to dry and tossed the rest of the cookies. I know, sounds like a waste, but I didn't like cookies at this point and my husband didn't like the lemon or that they weren't frosted with buttercream, which is tasty but you can't make it perfectly smooth easily.

Poured Cookie Frosting
4 cups sifted powdered sugar
1/4 cup milk
1/4 cup light corn syrup

Combine all ingredients and add coloring as desired. Use full-strength icing to outline and add milk to thin for filling-in.

Thursday I baked the white cake. Once again I couldn't get it perfectly white, it browned a little. The first layer came out nice, so I was hoping to avoid my previous crumbling experience. Have I mentioned that we are moving soon? There are boxes everywhere. While I was baking my husband had moved a large houseplant in front of my one access area to the table so he could see the TV better. I had already flipped the cake onto a board so I could then flip it onto the cooling rack right side up. By the time we got the plant moved and I got the cake onto the rack it had broken into three pieces. I was prepared this time with double everything so I had plenty to make more.

I also worked on the trees, the royal icing leaves had dried and I only broke a few trying to get them off the waxed paper. I dried them flat to be on the safe side. I used more royal icing to attach the leaves to pretzel rods. This was very difficult and most of the trees broke at least once and some of the glue icing dripped down a bit. I held the pretzels upright with scrunched paper towels in a round pan and let them dry in the fridge.

Friday I got a last minute order for a vegetaria red velvet cake. I was very excited to use egg replacer, I had always used water, flour, and oil to replace the eggs. I am still perfecting my vegetarian cake recipe to make up for the missing eggs and it's still a bit crumbly. I also bought Bake Even Strips so I wouldn't have to handle the cake so much to level it. They worked great, the cake did rise evenly so I didn't have to level it. With both of my new toys the cake ended up even crumblier than before.

I had thought about using xanthan gum, a common ingredient used in gluten-free baking to help bind it together. It is pretty expensive so I wanted to try the egg replacer first. So now I am going to make a test cake with some xanthan gum and use the bake even strips again and see how that goes. I have another vegetarian cake to deliver on Saturday so I hope this does the trick.

Saturday morning I frosted the jungle cake and finished decorating it. After the party I rushed home and decorated the red velvet cake with whipped cream.

In the end, both cakes turned out beautifully and I am happy to take my findings and continue on my baking adventures.


If you can't tell, she started eating the grass before we could get a picture and light the candle.


The candy letters are a thin layer of baby blue for the letter-front and chocolate for the backdrop.

Make it a sweet day!

Wednesday, September 9, 2009

Raspberry White Cake

The cake turned out beautifully. Too bad I had my dates mixed up. The party is October 9th not September 9th. Oh well, everyone else seemed to enjoy my mistake tremendously.

I still couldn't pull off a white cake that didn't brown on the edges. I even undercooked it a bit but that just left it a bit uncooked in the very middle with brown edges still. I've tried the "keep the temperature at exactly 350 degrees" theory, I think I should try the "cook extremely slowly" method like you do for cheesecake. It can't hurt. But the cupcakes from the same batter came out perfectly white, probably attributed to the shorter bake time, but were completely cooked.

I'm sure I've said I'm not a big frosting person. Usually I see it as the medium to decorate the cake and nothing more. Using the exact same recipe I've always used, Wilton's Buttercream Icing, this icing was especially fantastic. I couldn't stop eating it! It was smooth and creamy but not too sweet and the perfect consistency too. I might be turned into a frosting lover yet.

White cake with raspberry filling and buttercream icing. I made the filling by using 1/2 cup buttercream plus 3 tbsp raspberry jam. Use jam instead of preserves if you don't like the seeds. The fresh raspberries on top were a real treat with the buttercream.

Monday, September 7, 2009

Cupcakes, Cakes, Truffles

It just occurred to me that I have a busy baking week. Today I need to make red velvet cupcakes, buttercream for the cupcakes, raspberry filling and 2 white cake layers. Tomorrow (Tuesday) I'll give the cupcakes to a coworker for her birthday. Tomorrow evening I will assemble and decorate the white cake with raspberry filling for a coworker who is leaving. On Wednesday I need to make the filling for the toffee truffles and on Thursday I will finish them to give to a friend on Friday for her birthday.

When am I going to pack and get my 10 hours of beauty sleep every night?

Here are the red velvet cupcakes with buttercream. Pretty and yummy!

Monday, August 31, 2009

White-White Cake Practice

Yesterday my goal was to make white cake that is actually white, not brown. There was both success & disaster. I thought to myself, “this is why we practice”. I started at 9am and wasn’t done until 9pm. I liked the end result, but it seemed like a lot of work for a little cake and some cupcakes.

Box Mix
You can call me a cheater, but I use box mixes for practice cakes. Of course, I have a few special tricks to make my cakes “better than a box mix”.

I started out with white box mix. It browned more than I would have liked. I waited ten minutes and then loosened the edges and flipped onto a board. I grease and flour my pans, line with parchment for anything over 9”. I’ve never had a problem with a cake falling apart besides my very first cakes without eggs (I have vegan substitutes now).

My first 8” cake came out of the pan just fine. Before I could flip the cake onto a rack to cool it broke into pieces. I hadn’t even touched it, it was just too light and couldn’t hold it together. It sure tasted good though! Normally, I would make cake balls out of any extra cake but I also only had barely enough powdered sugar to make the frosting I needed for the cake, so I decided to wait and see.

So, saddened that I wouldn’t have enough mix for another 8” layer, I resigned myself to making more batter to replace it. I baked the other two 6” cakes and the second 8” cake, they all came out beautifully, only very lightly browned. I have no idea why that first one fell apart because all the batter was from the same batch. Maybe it had to do with the wait time between the cakes?

White Cake Batter Disaster
I found a white cake recipe online from what I considered a trusted source. This recipe promised to make white-white cakes so I wanted to try it. What a disaster! I followed the directions exactly, weighing all the ingredients, and the batter was very runny. I figured it might be part of the secret so I would give it a shot.

What a disaster!

The “cake” boiled out of the pan and all over the bottom of my oven. I tossed the “cake” and the rest of the batter. While the oven cooled off I did all the dishes and counters in preparation for the next batch. Mind you, this is all for one 8” layer so I can finish my practice cake.

The oven got cleaned as best I could and I made a batch of my standard white cake batter. Good thing I bought lots of eggs because I had to use double the amount to use all egg whites for a whiter cake. I made the 8” layer I needed and used the rest of the batter for 12 cupcakes. I will admit that the homemade recipe version was a little yellower than the box (I have no idea how, I used all-white ingredients for both).


Icing
Because I had over-ripe bananas I needed to use I also whipped up a batch of banana cupcakes. While the cakes were baking I had made the Snow-White Buttercream Icing (recipe from Wilton). I followed the directions and added the recommended amounts of water and corn syrup to get the right consistency. However, I will use less corn syrup next time. Corn syrup is great to make the icing stretchy for drop strings or leaves but that same stretch can cause the icing to droop down the cake if it’s not kept cool enough.

I also tried another tip from a cooking website about crumb coating. I had always crumb-coated my cakes with cake glaze but that is messy and time consuming plus I didn’t have enough powdered sugar. It recommended thinning ½ cup of icing with milk until it is very thin and spreading over cake then cooling it. This did not work well, the icing was too thin and drooped down the cake and then when I went to apply the regular strength icing it just slid around the top. So I scraped off the failed crumb-coat and then regular strength icing as a base for the fondant.

Fondant
I rolled out the fondant I made the night before, which went much better than I expected considering what kind of day I was having and all the fuss made about how difficult fondant is to work with. I think I made it a little too thick and that could have helped hold it together better.


I piped a bead border, a little more difficult because of the stretchy icing. Attached the heart candies with icing and frosted the cupcakes, also adding a heart candy. Amazingly I had enough icing for the banana cupcakes and I flavored it with lemon and some lemon yellow icing color.


Throughout the day I had been melting candy and making red and pink vanilla candy hearts. I wanted to color frosting for the border in pink to match the pink candies. Using just pink Wilton icing color it was too day-glow pink. I took half out and added more white icing. I was stuck for a while trying to figure out what to do when I thought of adding some red too darken it up a bit. That didn’t do much more than take the edge off. Then I decided to try to tone it down with some copper (light skin-tone) color. Voila! Matching pink icing that doesn’t glow in the dark.


Wrap-Up
It was a productive and tiring day. I learned a lot from this practice cake and am glad I allowed myself plenty of extra time. Lessons learned: have lots of extra ingredients in case disaster strikes, don’t use so much corn syrup in icing, don’t crumb-coat with thinned icing, roll fondant a bit thinner and I want to test the theory that letting the batter sit helps keep it from browning.

I have to get ready for the day and then drop these goodies off for others to enjoy. Thank you for visiting.

Make it a sweet day!

~Tawny

Sunday, August 30, 2009

Marshmallow Fondant

Tonight I made marshmallow fondant for the first time. It went pretty well, the second batch going better than the first because I was more liberal with the water so it didn't take so much time to finally get the right consistency. I did manage to scrape half my finger across the microwave door latch so I had to wear gloves for the second batch. Turned out to be a blessing in disguise because it was much easier to knead with the gloves on. My finger still stings though.

Marshmallow Fondant Recipe

16 oz bag mini marshmallows (buy the good brand)
2 lbs (approx. 8 cups) powdered sugar
cup of water
small bowl vegetable shortening

Yields: 3 pounds (48 oz), enough to cover a 4" high 12" round cake

Melt marshmallows and 1/4 cup water in microwave in 30 second intervals until completely smooth. It's best to use a Pyrex glass bowl since the sugar mixture gets very hot. Add most of the powdered sugar, I like to sift mine to avoid clumps, and mix first with a wooden spoon then with hands. Using gloves may help keep the dough from sticking to your hands. Use the shortening to grease your hands and the counter while kneading the dough. Add more powdered sugar if dough gets too soft. Keep adding small amounts of water until the dough is smooth and stretches without tearing. Mold into a large square, coat with shortening and then double wrap in plastic wrap. Allow to "ripen" overnight at room temperature. You can then knead it until soft to use right away or store in fridge for several weeks.

If you want to add color or flavoring I recommend adding it to the melted marshmallows before adding powdered sugar. You can keep adding coloring while you are kneading to reach the perfect shade so don't go overboard. If you're adding coloring I recommend wearing gloves to protect your hands, especially for dark shades. If you want brown or black fondant start with chocolate fondant.

Chocolate Marshmallow Fondant:  either substitute the regular marshmallows for chocolate flavored marshmallows or add 1 oz melted unsweetened chocolate plus 1 tbsp baking cocoa into melted marshmallows. Or maybe both would taste extra good?

Friday, August 28, 2009

Catalog Finished!

I've finally finished my first catalog and I'm very excited!

I have a Word version available if you would like a formatted version to print. I am located in Federal Way, WA. Please call or email for consultation.

I look forward to making your next occasion extra sweet!

Tawny’s Treats
Cupcakes ~ Candy ~ Cakes ~ Cookies
206 . 228 . 4111

Cakes
Apple
Brownie
Butter
Carrot
Cherry Chip
Chocolate Mint
Chocolate Orange
Chocolate Pound
Chocolate Sponge
Coconut
Coconut Pineapple
Cream Cheese Pound
Dark Chocolate
Devil's Food
Fudge
German Chocolate
Gingerbread
Lemon
Milk Chocolate
Mint
Mocha
Orange
Peanut Butter
Pumpkin
Pumpkin Apple Spice
Red Velvet
Sour Cream Pound
Spice
Sponge
Strawberry
Vanilla
White
Yellow

Icings
Apricot Glaze
Buttercream
Cake Glaze
Cappuccino
Caramel Buttercream
Chocolate Buttercream
Chocolate Fudge
Chocolate Poured Fondant
Cocoa Whipped Cream
Cream Cheese
Dark Chocolate
Fluffy Boiled
Ganache Glaze
High Humidity Buttercream
Key Lime Buttercream
Key Lime Cream Cheese
Lemon Buttercream
Maple Buttercream
Marshmallow Fondant
Mocha Buttercream
Orange Buttercream
Peanut Butter Buttercream
Poured Hard Cookie Icing
Quick Pour Fondant
Snow White Buttercream
Stabilized Whipped Cream
Sugar Glaze
Whipped Topping
White Chocolate Buttercream

Fillings
Chocolate
Chocolate Mousse
Cinnamon Cream Cheese
Cream Cheese
Lemon
Pastry Cream
Praline
Strawberry
Strawberry Cream
  • Pricing is $2.00 - $4.00 per serving, depending on type of cake, icing & decorations
  • Vegan cakes available in most flavors for 8” cakes. Additional charge of $6.00
  • Special orders are available upon request

Cake Serving Chart
6" Round - 12 servings
8" Round - 20 servings
9" Round - 24 servings
10" Round - 28 servings
12" Round - 40 servings
8" Square - 20 servings
12 Cupcakes - 12 servings
24 Mini Cupcakes - 12 servings

Baked Goods 
Chocolate Chunk Cookies (24) - $8.99
Chocolate Sugar Cookies (24) - $14.99
Coffee Cake (18) - $14.99
Fat-Free Brownies (24) - $11.99
Fat-Free Chocolate Cookies (30) - $8.99
Fudgy Brownies (24) - $11.99
Magic Cookie Bars (18) - $11.99
No Bake Cheesecake (8) - $14.99
No Bake Oatmeal Cookies (30) - $8.99
Oatmeal Cookies (60) - $8.99
Peanut Butter Brownies (24) - $11.99
Peanut Butter Choc. Bars (108 1" sq.) - $11.99
Peanut Butter Cookies (24) - $8.99
Peanut Butter Cup Tarts (38) - $14.99
Spice Cookie Ornaments (10) - $14.99
Sugar Cookies (48) - $14.99
*Add Walnuts $1.49

Candy
Candy Letters - $0.15
Candy, Molded (1-2 colors) - $0.25
Candy, Molded (3+ colors) - $0.39
Cocoa Fudge (77 1" squares) - $8.59
Cream Cheese Mints (32 1-tsp balls) - $3.39
Eggnog Truffles (60 1" balls) - $12.99
Gingerbread Truffles (60 1" balls) - $12.99
Lollipop Mold, Candy Only - $0.45
Lollipops - $0.50
Modeling Chocolate (1/4 pound) - $4.99
Old Fashioned Fudge (81 1" sq.) - $6.99
Peanut Butter Truffles (30) - $12.99
Peppermint Truffles (60) - $15.99
Toffee Truffles (6) - $12.99
Truffles (25) - $11.99
White Chocolate Cherry Truffles (20) - $15.99
*Upgrade to Premium Candy $1.99

Candy Colors (vanilla flavored): red, yellow, blue, green, white, purple, orange, pink
Flavored Candy: peanut butter, chocolate mint, light cocoa, dark cocoa
Premium Candy: light cocoa, white, dark cocoa


Have a sweet day!

Sunday, August 23, 2009

Chocolate Chips

I suppose my story is similar to many others, it all started with chocolate chips. We always had the staples in my house: flour, sugar and eggs. The only thing stopping me from a delicious batch of cookies were the absent chocolate chips. I would beg and plead, "Someone! Anyone! Please buy me chocolate chips and I will make you delectable cookies!"

I stuck with cookies mostly, seemed easier than other desserts. I sometimes helped my mother around Christmas make fudge, butterscotch haystacks and lemon meringue pie. I didn't know it at the time but a mini Martha Stuart was in the making, bubbling just under the surface. In school my creatvity was unleashed through the clarinet, then the oboe and I also tried my hand at oil painting.

College started and I had to take more than a full course load and go year round under my scholarship agreement. I also worked full-time at McDonald's to support myself. I don't think I did anything creative those three years. Whenever I wasn't taking class, doing homework or working I was sleeping, watching TV or playing video games. Not much creativity there unless you count building crazy mansions in The Sims.

Like magic, shortly after I was released graduated from college my inner Martha started looking for my next hobby. Chris, a friend from work, agreed to help me sew a skirt so I gave it a shot. While frustrating, I had fun making that skirt, which I still have and I wore it until my dog ripped a big hole. She loved to quilt so I started making a baby quilt for my niece Hannah. I had hoped to finish it by the time she was born in September 2007 but it ended up being a Christmas present instead.

Then I started making a super king size quilt for myself. I'm still working on it. Okay, not working on it per se but I do have all the pieces cut in a box. You'll understand why in a moment.

I wanted to create a scrapbook for my wedding and honeymoon pictures, but it was too expensive and I didn't want to sucked into what seemed to be a cult of mad scrapbookers. So, you know what happened...what would be too expensive to buy all at once could slowly be accumulated, who knew? So I did end up becoming a member of the cult and that is now my main hobby.

Of course, I'm not one to sit and enjoy, I'm a multitasker! In just a few years I also got into cross stitch, crochet, baking, cake decorating and candy making. That's how quilting got pushed to the fringes. The other hobbies have to share with baking because I'm the office baker now, It's expected of me to create goodies for every potluck.

I'll wrap up with some of my baking history in pictures:

No bake chocolate oatmeal cookies


Peanut butter bars for our office Christmas party


Kitty cat cake to welcome our new Admin


Bridal shower cake for my friend Misty


Misty's wedding cake, with two toy Harley's as the topper

Cupcakes for Chris' birthday


My sister Tessa's wedding cake


My dad's 50th birthday cake


I love the brown on white color combo!


My famous red velvet cake for Valentine's Day


Candy writing for a birthday cake


Chocolates and truffles


Sugar cookies with poured frosting


Cream cheese pound cake with
strawberry cream filling and buttercream

This cream cheese pound cake tasted so delicious with the strawberry filling and buttercream. The cake baked completely flat. The loaf browned, but I was going to level it anyway so it didn't matter. The cupcakes baked beautifully with no browning. Yum, I'm going to go have a piece right now!